Wednesday, February 22, 2012

Romain, Nigel... and Betty

This is Romain. He is from France and has a pretty heavy French accent which is lovely to listen to. He is a tree surgeon and garden designer in the Sevenoaks area.

You can check out his website here: http://www.blackwren.com/


he was one of the chainsawers during the January tree felling. Proud Papa to a brand new baby girl, and two others, making 3 girls for him. (John has 3 girls also... is there some rule about having 3 girls if you are a tree surgeon here!?)

And you've sort of met Nigel before... you've seen his red boots and heard his voice anyway in the "let it snow" video from December.


here he is again wedged between some trees... not exactly sure how he managed that!

Nigel has been involved in the scouting movement for many years and now works part-time for them in Sevenoaks. He's pretty experienced at wilderness camping and has acquired many wilderness "survival" skills. He and his family also do Morris Dancing, which is something I'd really like to see sometime while I am here!

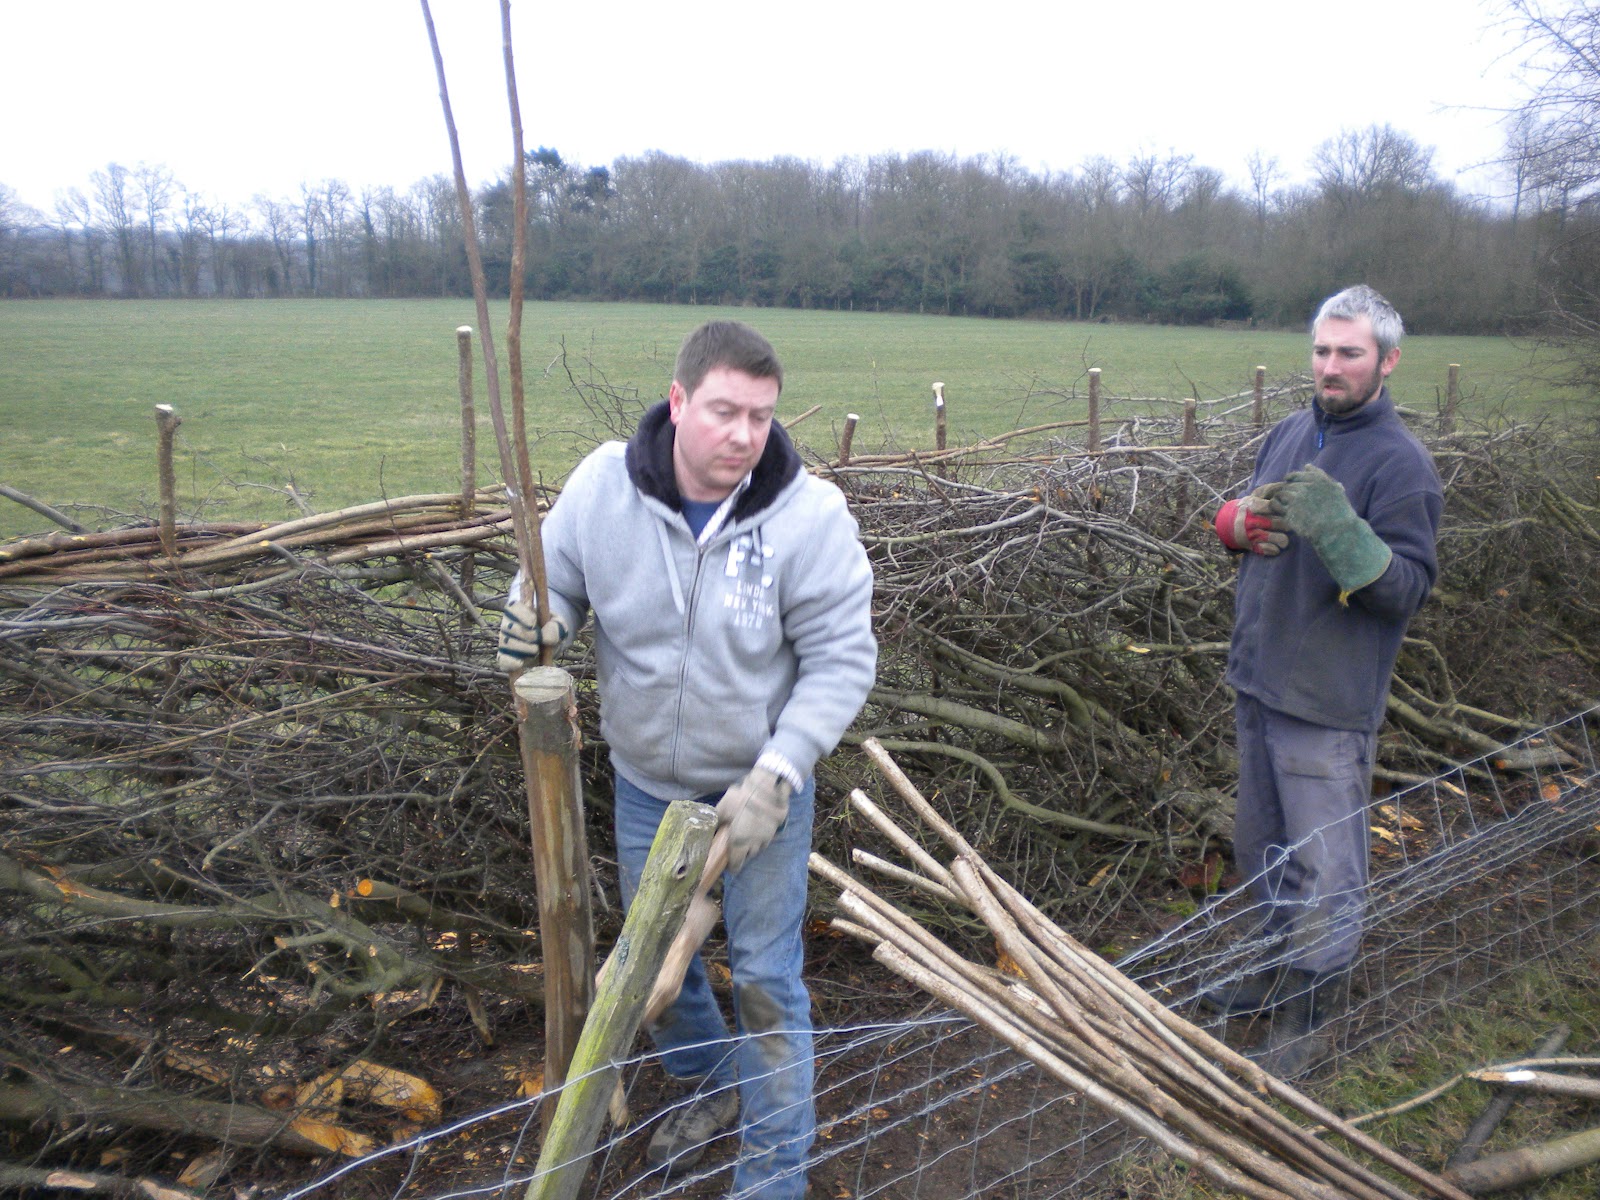
John was off teaching one day and so the three of us were working in Bushy Wood. This turned out to be a wonderful day for "Betty" (my billhook) and me.

Up until this point, she and I had not spent much productive or UN-productive time together, as the case may be. I'd been a reluctant billhook user... for various reasons.

I was kind of self conscious for one thing.

I mean, imagine yourself as me - a slightly chubby woman with muscles like a cartoon characters... that roll to the bottom when they hold up their arms... OK. Maybe I'm not quite that bad - working alongside all these big strong men who can seemingly cut through anything with their billhooks... leap over tall trees in a single bound... and carry logs out of the woods on their shoulders.

All at the same time.

John had given me a basic lesson... I knew to use a hook safely and effectively I was supposed to a) lock my elbow and wrist and basically just rotate the shoulder... b) keep the wood between me and the billhook c) make sure no bodies would be in the path of my billhook, should it fly out of my hand... including any part of my own.

For cutting green wood, it has alot to do with the angle with which the hook makes contact with the wood. You are not wanting to cut straight across the grain but rather on a pretty sharp diagonal. And in the case of snedding a tree, working from butt to tip is the proper direction. Going from top to bottom means you have a better chance of causing the bark to tear off. Unless you are me of course, in which case there is a pretty good chance of messing something up even using proper "form."

There was also some fear factor involved... having broken my thumb on my right hand a couple years ago, I did not want to repeat that by any means. Also, did not want to cut any body parts off or sever any major blood vessels... Or minor ones either for that matter!

Another thing was that every time I did have my billhook out and gave it a try, the guys would have suggestions and advice for how to make specific cuts, hold the tree, etc etc etc. All very worthwhile and good! And I desperately wanted to heed it... all. But, what I discovered is that while everyone has the same basic formula, they all tweak it until they find what works best for them...

and so, what I really needed was time to just try to put everything I had heard, and seen, and learned, together, and find out what worked best for Betty and me.

While we were at Fern Hill, it was a big job. With John and Romain chainsawing that left Nigel and Mike and I (Nick and Richard were there sometimes too) clearing away... some days there was 3 of us clearing away but usually just 2, and I really wanted to make a contribution to the work and not just be off by myself, hacking up branches.

One free weekend I did bring a few ash branches away from the site to practice on... and made the slightest bit of progress.

But, there are alot of things to think about all at once, and for someone with poor proprioception as it is, it is a bit of a challenge!

The reality of it is this. Learning to use a billhook takes lots of practice! All the guys said it took them tons of practice too, so, it's not just me and my particular set of challenges.

That day in Bushy Wood though, with Romain and Nigel, I felt quite comfortable having a go with Betty. For one thing, there were not that many trees to fell... Some of the trees were hazel (small).
But probably most importantly, the two of them just let me be... giving me the time and space I needed and a thumbs up or encouraging word from time to time when they noticed something went right!

Alot can be said for positive feedback!

As a matter of fact, they gave me so much space that I forgot about keeping the fire "fed" and they had to come over and save it at one point.

But. I'm here to tell you something did click for Betty and I that day! Hurray!
Thursday, January 26, 2012. A day that will go down in history!

Mine at least.

(I have since been out there again and found I needed to kind of re-orient myself, but, it took slightly less time to feel like I was making progress once again. I mean I still don't always hit the same spot twice, or have the angle right, but sometimes I do! I try to be aware of what I'm doing and when I do it right, to remember what I did and repeat it next time. Thing is though... every one of those dang trees is different, calling for continuous thinking, re-evaluating and tweaking. That makes me tired in my brain. And. I figured out why peoples shoulder ached in January...)

So. It was a great day. I felt like I got to know Romain and Nigel a little bit better too. I think we had some "bonding" time!

Weather wise we has a mix of sun and rain (mostly sprinkles). At one point though, we got quite a heavy rain shower and so all piled into Romain's Land Rover for a few minutes until it passed.

That was fun. It made me feel somehow, like part of the team. Like we were comrades.

And then, once the rain had passed, there was a beautiful double rainbow, which I got on video. (OK. I intended to take pics, but discovered I was in video mode... so, here it is!)


And. I took that rainbow as a personal reminder, the same as I always, always do...

That dreams really do come true.

A year ago at this time - I was dreaming about coming to England... to learn the things I am learning.

And look at me now... I am living that dream and thinking what else is possible?!

So, if you have a dream that you have carefully placed at the back of the highest shelf in the closet...Get it out and dust it off, don't give it up!

Can't think of a better way to close than this...

hugs-
susie


Monday, February 20, 2012

Bushy Wood and Walk Back...

Spent Valentines Day morning in Bushy Wood... appropriate, since I love it there.

Did a few videos, there and along the (mile?) walk back to the Small Barn.

Thought it might be a break from the written word... let me ramble on in audio for awhile instead!!

Hope you enjoy!

Bushy Wood and Pea Sticks
http://www.youtube.com/watch?v=RX6OhbXga2w&feature=youtu.be

Public Road and Hedges
http://www.youtube.com/watch?v=s0yk83YYbyU&feature=youtu.be

Not all public roads are this narrow... lots of them are two lanes and marked with a line down the middle... but, they are just as likely to have hedges right up to the edge of the road!


England has an incredibly wonderful network of public footpaths, many of which pass through private property... woodlands and fields. They have come up with various creative ways to let humans pass through hedges and fences while keeping the cows or sheep in!
In the form of stiles and gates...

Cow Proof Gate
http://www.youtube.com/watch?v=uzNsRS4ykWM&feature=youtu.be

Signs and Stile
http://youtu.be/oAHFOGZ8cik

Cow Grates and Lime Shoot Fence
http://www.youtube.com/watch?v=rby8p17veMs&feature=youtu.be

Hedge Laying Workshop

Saturday & Sunday, January 24th & 25th-

Please take a moment to check this site out:  http://www.hedgelaying.org.uk/
and if not for all the verbiage, then at least for the picture on the National Hedgelaying Society's home page.

I've tried to take pics of the hedges from the train on my way down to Kent, but, taking pictures from a moving train just doesn't work...

That is a beautiful picture. It really gives you an idea of what much of the English countryside looks like... and just how common hedges are here in England.

Historically, hedges have been used as a means of containing farm animals in fields... but as I think I've mentioned before, they are quite common in the residential landscape here as well.

Just to give you some idea, I found some numbers just now online- I can't vouch for their accuracy, but, I have no reason to think they are inaccurate, because, as I've said, hedges are a big thing here.

In 1946 there was 500,000 miles of hedge in England. In 1984, 382,000 miles in England and Wales and then it dropped again in 1993 to 236,000 miles. I can't find any numbers more recent than that, if I do, I will come back and add it.

But, I think that is enough to get my point across.

There are lots and lots of hedges in England.

There are a multitude of styles, depending on the region and the site specific topography. Hawthorn (Crataegus spp.), Blackthorn (Prunus spinosa) and Hazel (Corylus spp.) are the plants most commonly used here, with the Hawthorn and Blackthorn being especially suited to creating a barrier because they have... yup, you guessed it... thorns.

Yessirree.

And to that I would add.

Ouch.

Hedges and/or hedgelaying is really a fascinating subject. I'd encourage you to google it or at least google up some pictures to oooh and aaah over. Because, to my way of thinking, hedges do not only serve the function of containing livestock, they also provide food and shelter for a multitude of wildlife.

AND!

They are definitely an art form. Function and beauty. Which is what I am all about these days. Or.

At least, I want to be...
So. This was such a great workshop!!! Hedgelaying is something I'd really, really like to learn how to do, and do well...

when I grow up!

Really wish I had taken some pictures, but, I find myself in a conundrum in John Waller's workshops... I want to write down or take pictures of absolutely everything he says or does... but that is

a) impossible and if I should try, then
b) I miss the next thing he says which is just as important and then
c) I ask a question that he has actually just answered while I was writing down the thing before which then is
d) a little disruptive because I am truly shocked he has just 15 seconds before said it, and everyone laughs (I hope they don't think all Americans are this ditsy... actually, I hope they don't leave with the impression that I am that ditsy either).

'Cause I'm really not!

John actually told me to put my notebook away during the last workshop (basketmaking)... yes he did, right in front of everybody.

"You're right, you're right, I know you're right..."
(That is a quote from When Harry Met Sally)

So. No hedgelaying notes and very few hedgelaying pictures.

BUT... WE DID GET SOME HANDOUTS WHICH WAS GREAT!!! AND THIS IS IN ALL CAPS IN CASE YOU KNOW WHO READS IT!!!

Let's see if I can give you a rough idea of what is involved... from memory... and locate some pics online to help...

1) Clear away the lower branches and any brambles etc. up to whatever height you personally need to so as not to poke your eyes out when you are kneeling down on the ground to cut the tree... for us, this was something like 30 inches or so.

2) Make the cut, using a sharp tool... billhook, axe, side-axe.  John has two side axes (one big, one small) that he uses. We used regular axes. Side axes are flat on one side enabling you to make the cut easier.

So, rather than making a horizontal cut (as you would if you were felling the tree) you make more of a vertical cut, so that you are leaving some of the outside layers of the tree (outer bark, inner bark, cambium and sapwood) attached to the root system. You are wanting the tree to live, and not die. If it does die, don't flip out though. Save that for if they all die.

http://www.arborday.org/treeGuide/anatomy.cfm

Also, you use the angle of the cut to determine the direction the tree will ultimately "fall" or lay in... Which will be at right angles to the direction of the axe blade.

The hedge we were laying was comprised of a double row of Hawthorne's spaced, oh I don't know, something like 12" 16" 18 inches (I am guessing) apart in the rows and the rows themselves about 18 inches apart.

We were trying to have the tops cross at the centerpoint between the two rows. So, pretend the base of the tree is a clock, we were shooting to have our axe hit the tree at say, 1 and 7... trying.

And, if at first you don't succeed? Try, try again.

And again... and again and again and again and, OMG again...

John makes it look much easier than it really is. As is the case with pretty much everything.

I found this pic on google...

hawk-conservancy.org

3) Then you, very carefully, ease the tree down (in the case of this picture, to the left) towards the ground until it makes a 30 degree angle with the ground. You want a gentle bend in the part that is still attached to the tree and roots, not a kink, because that might retard sap movement, and potentially kill the tree.

4) Next, cut the remaining stump off with a saw. Preferably a sharp one. And one for pruning, because it is nicely curved and you are working in pretty tight spaces. A bow saw will make you think swear words in your head which you might then self censor so that what comes out of your mouth is something like, "grrrr!" or "crikey!!" or something like that.

As far as I am concerned, bow saws are the work of the Devil.

Someone, please, name me a case when they actually are useful. Because so far, every time I've used one in the woods I just want to scream and heave it far, far away from me.

5) Now we are at the part that is my absolute fav. The pruning and weaving part. Here, we are removing any branches that are dead, or growing in a way that they cannot be contained in our imaginary boundaries. We want the hedge to be 18" thick, and 4' 6" high.

I love this part. The weaving in of the branches to fill in the gaps. Making it look neat and tidy. I think this might have been the only time during the whole course I was not uttering some kind of anguished sound. I'm not saying I wasn't talking... the incidence of that are far and few between.

I could do this weaving in thing 'til the cows come home though.

6) Insert stakes in the ground along the center of the hedge, trying to interlace them through the branches of both rows of layed trees in the process, and spacing them 18 inches apart. I think the stakes were hazel? Someone please correct me if I am wrong. To do this we used a wood mallet.
Similar to this...

inverclyde.gov.uk

but, of course, John made his. I'll try to get a picture of it sometime.

Something else I have learned here, following along the thinking of using the right tool for the job, is that if you are putting a wood stake in the ground, use a wood mallet... if you are putting in a steel stake, you need a tool with a steel head... etc. I am probably not getting this quite right, and need to ask some questions about this so I understand the philosophy behind it. Why not use a cast iron or steel mallet to hammer the hazel stakes in to the ground?

7) Next step, adding the Hazel "binders" along the top. These are small hazel trees that have had all the side branches and the top removed. There is a specific way to weave them together between the stakes, which was, again, not as easy as it looked when JW did it.

One thing I think I've learned is when John says "behind" what it usually means, and translated into my form of English, is "furthest left" and has nothing to do with the concept of being "in front of" or "behind". Make a note of that.

Basically though, it was a pattern of back to front and then front to back going up and over. Keeping the binders tight to the trees, and at the same height (4' 6") all the way along.

8) Finally. Last thing to do is saw off the tops of the stakes, all at the same height, and with a 30 degree downward angle that is parallel to the line of the pleached trees. John makes his stakes one "hand" height above the binders.

The final result is gorgeous... see for yourself!


I did manage to snap a few pics... enjoy.


day one, lunch break... sunny but cold and windy.

King John #1 - sitting on his wheelbarrow throne.
See that jug of water, bottom right? OK. See that silver thing to the left of it, by JW's feet? That is a Kelly Kettle. That thing goes every where with us and enables us to make tea... in the woods!! I want one of those someday, too!!

binding and staking

we worked together in teams, this is my team-mate James...
we were also team-mates during the coppice workshop two weeks prior!
We are standing in front of the section we did!

JW opted to leave this little oak tree to grow in the midst of the hedge... wish I was going to be around to see how beautiful that is going to be 20 years from now!

Ian (left) and John (#2) have just put in their stakes (Ian is holding JW's mallet, but it's half hidden by the fencepost) and now selecting binders


Ian and John (there were two other Johns besides JW!) binding

John (#3) trimming stakes

many "underwoodsman" jobs include a fire to get rid of the "rubbish" this one was relatively small compared to the tree felling fires!


Tim and John Waller by the dwindling fire.

Our class... (L-R) John Waller, James, John #3, Tim, Ian and John #2
standing in front of our handiwork!!!

before and after (after and before?)

And there you have it. One beautifully layed hedge, if I do say so myself!

I have given myself a headache... need a walk and water before I carry on...

xo-
susie


Sunday, February 19, 2012

Mike

I met Mike on the same day I met John Waller for the first time way back on November 4th.

Just over 3 months now... wow.

Time flies when you're having fun!

That day we all were pressing apples in the morning and then cutting Hazel in Bushy Wood for the afternoon.

I've had the honor of working with Mike quite a few times up to this point and he was part of the tree felling crew on Mondays, Wednesdays and Fridays.

Mike has been volunteering at Bore Place and working with John now for something like 10 years and has taken many if not all of JW's workshops-so, he knows the ins and outs of what John does pretty thoroughly. He also holds quite a wealth of knowledge on quite a few other things as well!

On Monday the 16th, John came to work with a pair of Pheasants that someone had given him. After lunch that day, Mike showed us how to pluck the feathers and I pretty much got to do the male bird all by myself!

This video was shot by Romain and I wish I wasn't yapping away in the background asking if he'd send it to me!

Bet he does too.

Sorry Romain, but thanks!!

Regardless, you can catch a little bit of what Mike is saying (about the gunshot) and you can see just how beautiful Pheasants are!

http://www.youtube.com/watch?v=4BS3RJwI0Eo&feature=youtu.be

(Before I forget. That guy with the red hair and beard in the video background is Nick, my Bushy Wood coppicing buddy! That's the only shot of him I have!)

Mike said you should be able to pluck an entire pheasant in about 45 minutes... I think it took me nearly twice that. I asked about what I'd heard about "dipping" them in boiling water and he said it is unecessary and makes for a messy job. Instead, the critical thing is to be sure to hold the birds skin down taunt while plucking to prevent the skin from tearing. The small, downy, keep them warm feathers come out with only a slight tug. The tougher feathers take a little more force but come out surprisingly easy if you are holding the skin and pulling in the direction the feather is growing.

I was in awe of how truly beautiful that bird was... and also at the intricate, symetrical pattern that the feathers grow. Mind boggling, really.

Later, Mike showed us all how to remove the guts which was again quite interesting if not a little bloody and just a little stinky too. You attempt to cut around the anus and use a string to tie it off before you pull everything out, which keeps all the poo inside. Mike thought the intestine might have been nicked, which made it a little stinky. The female was less bloody (she had less shot in her) and not stinky at all.

Probably not something i'll ever do again myself, but, it was quite an interesting lesson just the same and an experience I am happy to have shared.

It was also a good lesson in being "connected" to your food. I found myself giving thanks for the pheasant as I was plucking him and being mindful that he died to become food that would nourish my body (our bodies), because Mike was going to make his famous Woodsmans Stew for our lunch on Wednesday.

That's what I call it, I'm not sure if that is the real name or not!

I kept a tail feather to remember it all by...


 not sure the picture really shows just how beautiful it is.

Mike also makes whistles out of Hazel, and sells them when he goes to shows with John. He made one for me!! It is beautiful and something you can bet I will treasure always. This is it...


on a raw hide string so I can wear it around my neck. It has a beautiful sound. Crisp and clear. Perfect for calling everyone together for tea!

Mike really loves to do campfire cooking and I was blessed to have three meals in the woods prepared by him.

The first was the Woodsmans Stew with dumplings, at Fern Hill. In addition to the stew we had a jacket potato (wrapped in foil and baked in the big fire!) And grated cheese for the top. It was all. SO. Delicious.

Romain brought us scones, clotted cream and jam for a real cream tea for dessert... yummy! We ended up having it later for tea because we were all full from the stew!

Then, that meal was barely done and over with, when someone said something about "haggis" and they were all oohing and aahing over it and talked about it for days.. well, a week to be exact. I asked once what it was and didn't really get an answer. I sort of thought it must be some kind of drink with alcohol in it, and they knew I didn't drink, so, I just kind of dropped it.

The following Wednesday, January 25th was a traditional Scottish holiday called "Burns Day" which commemorates the birth of famous Scottish poet, Robert Burns.

You can read a bit about it on the Wikepedia site:
http://en.wikipedia.org/wiki/Burns_supper#Host.27s_welcoming_speech

Haggis is the traditional meal for burns day, and Mike went all out in preparing that for us all... haggis, jacket potatoe's again, mashed turnip, gravy and chocolate cake for dessert. (Thanks to Mike's wife Judy!)

Mike serving up the food

This is Mike reciting the traditional speech:
http://www.youtube.com/watch?v=QF6J45s2rPg

It was delicious and fun even without the whiskey part.

And. Finally. To celebrate our last day in the woods, Friday, January 27th, our own personal chef made us another scrumptious meal. They just kept getting better and better and better.

Our last meal was steamed mussels in some kind of oh my gosh good creamy sauce with jacket potatoes, again (dug out of the fire by our fearless leader, and potatoe retriever, John Waller)
John retrieving the potatoes - remind me again... why are you wearing th hardhat?

but none the worse for the wear...

Romain and Mike

Because Mike has worked with John for so many years, he knows what to look for in trees... as in, what parts can be used for what etc. So, when John was getting ready to fell that Big, Big, Big tree, Mike suggested that we/they should harvest as many "pegs" for "layering", as possible from the upper branches before they made it to the fire. From what I have read oak pegs are sturdier and don't split when they are hammered into the ground.

So. After the tree was felled, he gave me a demo and then he and Nigel went about processing the branches to make pegs... and the general clearing away continued!

Here it is:

Look at them with their billhooks! I am still impressed with how easy they all make that look!

So. Now you've met Mike!

Thanks Mike, for all the delicious meals, my beautiful whistle and all the incredible bits of knowledge and wisdom you have shared with me along the way!

You will not be forgotten-
bon appetite!
susie

January Tree Felling

I traveled down to Bore Place January 12th. Try as I might, I'm not sure I've got the concept of packing light "down." I packed and re-packed a couple of times. This is what I got it down to...


... a suitcase, a duffel and a backpack. I mean. I was going to be gone for 2.5 weeks (which then turned into 4) so I brought things to do in addition to clothes etc.

I took the train to Edenbridge, and a taxi from the rail station to Bore Place.

Ran into Andrew, first thing, who offered to make me a cup of tea, which was very welcome after the train ride... uneventful as that  was.

Surprise, surprise, surprise!

I got settled in. Had a delicious meal that included venison sausages (my first ever) and got to bed fairly early. I hoped for a good nights sleep. Friday the 13th would be a big day - my first working at Fern Hill helping out with the tree felling. I didn't really know what to expect, but was eager to find out.

Met John and the crew at the workshop 8:30 Friday morning for tea before we headed off. The crew consisted of John, Romain, Mike and Nick (my Bushy Wood coppicing buddy).

Even though the sun was shining, it was a chilly morning, so the tea helped to warm us up, from the inside out.

We loaded tools, tea kit, backpacks and lunches onto the trucks and headed up to Fern Hill.

Fern Hill is located at the northwest of the Bore Place property.

The job essentially was two-fold... restoring a 50 year old (predominately) Ash coppice by harvesting most all the trees in the "shaw" (see: http://en.wikipedia.org/wiki/Shaw_(woodland)). The wood will season for 2 years or so and then be chipped to fuel the huge wood chip boiler that heats the Main House and I'm not sure what else at Bore Place.

This was how it would work...

John and Romain would be felling the trees with their chainsaws... limbing them and cutting the usable wood (anything say 3" diameter or more) into 6 foot lengths. The rest of us would be dragging everything out of the woods... the 6 foot lengths got stacked in large piles at the edge of the field and the unusable stuff went on a huge fire.

Obviously, these were big trees and this was serious business, so there were plenty of safety precautions to be followed. John went over chainsaw safety once again with me and gave me a hard hat to wear. Biggest thing is to stay out of the line of the tree fall.

Chainsaw too.

The first thing the chainsaw guys do after assessing each tree is to cut the "smiley" wedge out of the front which will determine what direction the tree will fall.

Actually, the first thing on a tree that is leaning in an undesirable direction is to attach a rope high enough up in the tree so that the other guys can pull the tree in the proper direction while the chainsaw operator is making the cuts. Most of the time I saw them use a  smaller tree (25' - 30' high maybe?) that they had removed the side branches and created a sort of "Y" out of the branches at the top. They had  a special way of winding up the rope and positioning it on the "Y" of the smaller tree and then maneuvering it up around the tree they were working on felling.

All that done, the cut is made at the back of the tree, and...
t-i-m-b-e-r!!!

Some trees require wedges to be hammered into the cut at the back... as you'll see in the two video's below. I kind of like this because then you are free of the noise of the chainsaw and can actually hear the tree!

After the tree was down the chainsaw guys went to town de-branching it and cutting it up in usable lengths. Important for the rest of us to be mindful of what they were doing, where the chainsaw was and where they were standing etc. as we began clearing away... as much as possible take what's on top first and be sure not to disturb the chainsaw guys footing!

The area we were working in was pretty brambly... those things have a tendency to reach out and grab your feet... tripping you up. They got me, a few times in the 20 days. Twice in one day... when I was pretty much out of it anyway due to not being able to sleep the night before and struggling to be vigilant and watchful. Thankfully, I did not impale myself on anything in the fall or hurt myself at all really.

Maybe just my pride a little bit.

For the most part I managed to stay out of the way when I was supposed to and not do something dumb to cause a problem for someone else. The guys all watched out for me too.

Thankfully.

Mike went over the fire building and safety guidelines with me...

1) always, always always be mindful of what the fire is doing when you are near it...

2) keep the ground around the fire clear of branches and brambles so you have a sure footing when you are loading the fire.

3) load the fire from one direction - with the wind at your back.


4) as much as possible keep the branches going in the same direction with the bigger end at the side you are loading from... and try to keep them fairly "flat" by removing bigger bits that are sticking up. This keeps the fire nicely contained and the wood in contact with the flame. It also helps keep the fire fairly well contained to one spot (we didn't want to destroy too big a patch of grass in the farmers field) and helps keep too many branches from sticking out all willy nilly and tripping someone up.

4) end of the day, clean up the fire site and it would be ready for the next day. (Next morning, all we needed to do was rake the ash off the top and there were hot coals still underneath... a bit of dead wood on top and most days the fire was going in no time at all!)

So that's tree felling.

I'm sorry I did not get any pictures or videos at Fern Hill.

I was seriously concentrating on being safe and actually accomplishing work!

Here are a couple videos though from Bushy Wood that will give you an idea of what it is like. This first one is John, felling a seriously large tree and hamming it up for us in the process:


This next video is Romain, felling the very last tree:

While it was indeed serious, hard, hot, sweaty and grueling at times there was plenty of laughter shared by all throughout the course of each day.

John is not a slave driver, we took regular breaks for tea all together and had an ample amount of time at lunch to rest and refuel... working until 4.30 or 5.00 each day... ending with just enough time to get the tools loaded back onto the trucks, while we could still see, as the day dimmed.

And most days, one final cup of tea at the shop before we all went our separate ways... to live our separate lives until the next day when we got to do it all over again!

I absolutely loved it, and was truly sad when it was over!

Stay tuned for a couple more posts pertaining to this in the near future!

hugs-
susie


Saturday, February 18, 2012

My Home... Away From Home... Away From Home

The Small Barn.

I think I've already mentioned how similar in "feeling" and layout the Small Barn is to Lillian's (the landlady) carriage barn residence in Jericho Center, Vermont where I lived for more than half of my life.

It felt alot like "coming home" when I walked in to the Small Barn for the first time.

Jericho Center is a very cool little town, and I'm not just saying that because it is my home town either.

Two doors down from Lillian's home (where my parents rented the main house) you will find The Jericho Center Country Store, which has some significant history of it's own! Not as old as the buildings on the Bore Place property... but still! Check it out:
http://www.jerichocountrystore.com/home

Past the store, around the corner, and down the road a piece, on a little country road, is the homestead of a very famous person, Wilson A. Bentley, more popularly known as "Snowflake Bentley." He loved snow even more than me (if that is possible) and dedicated his life to taking pictures of it.

This is the link to the "official" Snowflake Bentley website:
http://snowflakebentley.com/

Jericho also has a few other "famous" landmarks:

1) The Old Red Mill:
http://www.jerichohistoricalsociety.org/mill.htm

2) Joe's Snack Bar... a burger, shake and fries with a "creemie" for dessert. Yum.

and, saving the best for last 3) Mountain High Pizza Pie... owned and operated by two of my favorite peeps ever, Kyle and Katina (I miss you guys!) Amongst other things they make the best Greek pizza, in the whole wide world, called the Mt. Olympus. Red sauce, spinach, feta cheese and black olives. It is to die for. And now... I am hungry!!!

So, that was a quick little 'tour' of my hometown... and now, back to my home, away from home, away from home... the Small Barn.


please come in!!!


see that red fire extinguisher on the wall at the right? That's where the front door is...
This is looking towards what will soon be the kitchen all along that back wall... the sink will be in front of the window! There is nothing better than having a sink with a view...

and this is the view out the window.. it is the Oast building-where they used to dry the hops and barley.  It is gorgeous. Those siding shingles are actually made of clay, which is a very common shingle making material in the Kent region. Saw them in Tunbridge Wells also.


through the gate and a sharp right is the woodshed... making it very convenient to keep the woodstove cranking! Walk through the gate and then straight ahead, past the Oast and that little road will take you to Fern Hill where most of the tree felling occured in January.


view from future kitchen looking back towards the sitting area...

and one of my favorite parts... the wood stove or "log burner"
and a couple John Waller baskets holding the paper and the kindling!!

sleeping loft

view from "my" sleeping loft


... decoration ...

The space has such great natural light, making it perfect as a studio space!!! I brought several projects with me... this is one of them... that I have so far been unsuccessful at finishing!


So, from January 12th until February 1st, this was "home" and I did not leave Bore Place for that entire 20 days! It was lovely.


A fire in the wood stove nearly every night, and that made the sleeping loft on that end, where I was sleeping, a warm and cozy place!


Chef Andrew kept me well supplied with food for my dinner meals. Becky and Elaine kept the fridge and larder stocked with all the essential breakfast goodies and especially the peanut butter, orange marmalade and real coffee!

I was invited for dinner "out" a couple times. The first was on Saturday, January 28th, by a group from Richmond College in London, who were also staying at Bore Place.

To get our dinner plate served we had to answer 3 questions...

1) who would we want to be friends with?
2) who would we want to have dinner with?
3) who would we want to sleep with?

Well. Golly. That was a bit of a challenge! Well, actually, #1 and #2 were fairly easy to come up with an answer for straightaway... though by the time I'd heard other people's answers I had other thoughts too, but I stuck to with my originals which were Beatrix Potter and James Taylor, respectively. My answer for number 3 was very generic and nebulous really, but, they accepted it... I mean, they weren't going to invite me to dinner and then not let me eat, now, were they?

Dinner was a delicious chicken curry, rice, garden salad, cole slaw and a multitude of breads and other sides... followed by a platter of cheeses and then a trifle for dessert!

There was great conversation over dinner. I was once again amazed at how comfortable I felt in the midst of a group of folks who all already knew each other. They were all very warm and welcoming.

They invited me to stay on after dinner for the evenings' entertainment, which consisted of a talent show of sorts. They were such a delightful group. It was a really fun evening for me, and gave me a chance to socialize, wear clean clothes and earrings even!

Then, a couple days later, Tina had me over for tea (supper) and fed me an authentic English meal, "bangers and mash" (sausages, potatoes and beans) with apple crumble topped with custard for dessert. Another wow meal.

(Eating the way I did I am hard pressed to figure out how in the world I lost 10 pounds during that stay! But I did. Hurray!!!)

Tina is the head gardener at Bore Place, and has done a pretty amazing job, by the way, with all the gardens on the property. I had met Tina on January 22nd, when I was out walking. I heard a chainsaw in the direction of the car park and followed the sound to investigate. Being the curious person I am. Turns out it was Tina and her hubby, Duncan, doing a little tree felling of their own. Oh, and lets not forget Basil, their adorable chocolate colored cocker spaniel.

Anyway. Duncan was away, but Tina and I had a fun evening. As I'm sure you can imagine - with her background in horticulture and at the Royal Botanic Gardens and mine in Landscape Design we have lots in common and lots to talk about.

Also, it was nice to have a little "girl talk" which I hadn't realized I'd been missing... but turns out I was. I mean, I've spent all of my volunteer work time here with guys. And, while there have been a few women, most of my fellow classmates in the Coppicing and Hedge Laying workshops have been guys as well. So, while all the men I've been in contact with have been absolutely lovely, it was nice to balance out the testosterone with a little estrogen and progesterone for a change!

The evening flew by... before we knew it, it was past both out bedtimes!

It had been dark when I walked over to Tina's armed with a little hand crank torch.  Not that it had gotten any darker outside as the evening progressed! But, I was grateful when she offered to drive me back to the Small Barn, it had gotten to be quite chilly!

Two fun evenings out in the span of just three days time. A very pleasant note on which to end a wonderful few weeks at Bore Place.

Enough for now?

Enough for now...

self portrait - one very happy camper!

hugs-
susie

Commonwork... Bore Place Part 2

Some pics from the gardens around the Main House...

a "hole" in the garden wall with strategically placed espaliered trees growing against the hedge on the other side of the formal garden and pool.


rustic chair and log stool!


espaliered apple tree


Seems like there is something new to discover every time I go out for a walk... Coming back from a walk one day along the driveway I spied an opening in the wall... found a little "secret garden" with this gorgeous living willow structure tucked in next to a little pond.


from the inside looking out at the little pond... the perfect place for tea on a summers day!


Is there anyone in VT who wants one of these... besides me?! Kathy? Hannah?

I can't wait to design and install one for you - and then cater a tea party for you in it!!!

Stay tuned for Small Barn pics!
xo-
susie